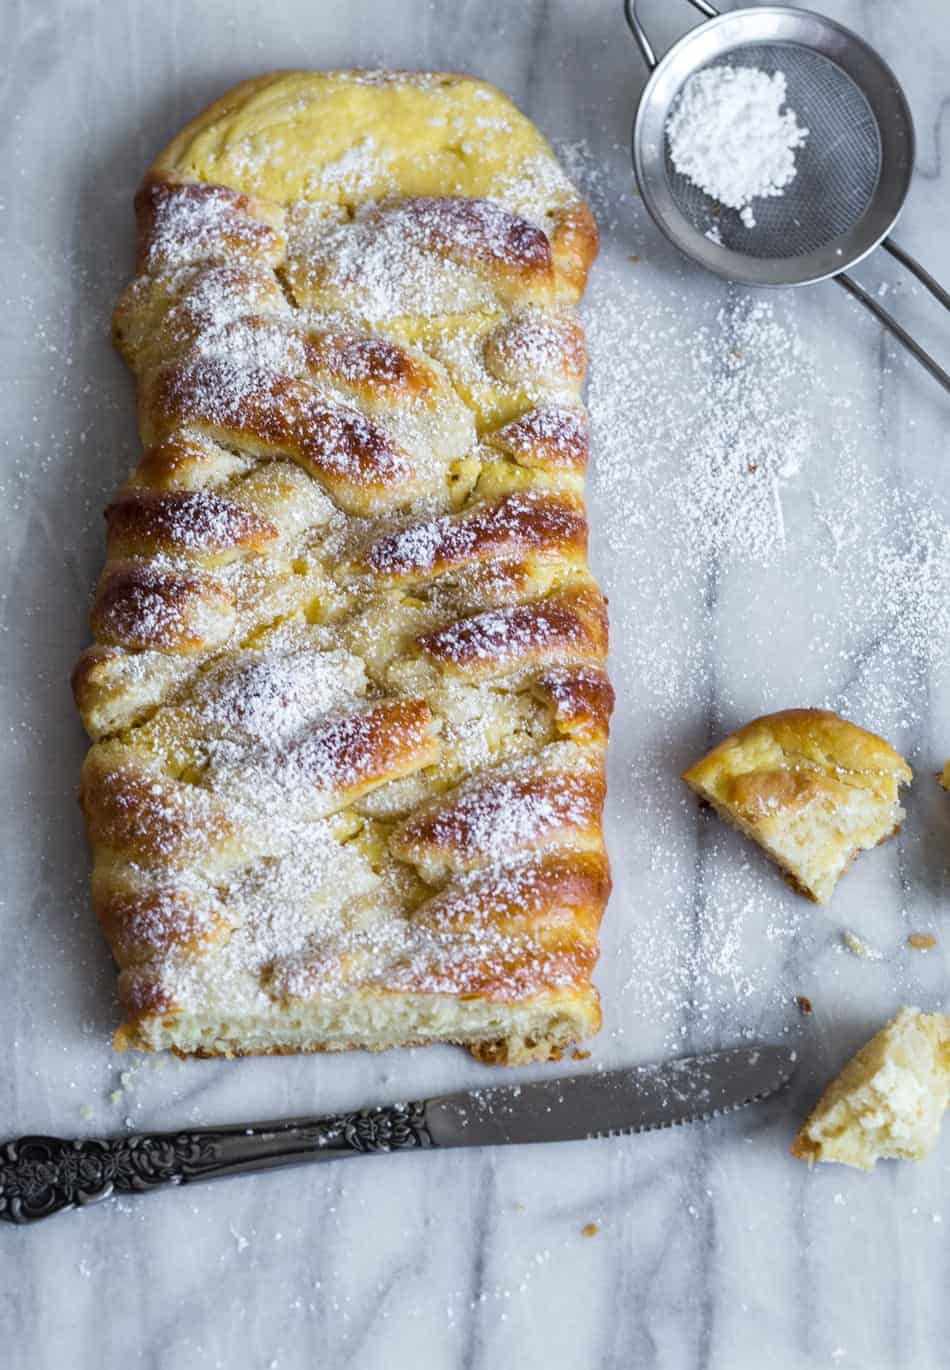
Easy Cream Cheese Danish Recipe from Scratch in 20 minutes
This cheese Danish recipe will blow your mind. The fluffy pastry filled with cream cheese will just melt in your mouth. Even though it will take some time and planning ahead to prepare this treat, rest assured that you won’t regret it. Not even one second.
Do you know those flaky, buttery, cream cheese filled pastry you see in movies and enjoy at coffee shops and bakeries? I could eat a ton of them. I bet you could too. They are simply irresistible.
Nonetheless they seem pretty intimidating to cook. But don’t worry. Things are not as complicated as you might think. You just need some time, planning and patience. You might not get the perfect looking homemade cheese Danish from the beginning. You don’t need to. I will tell you a secret: I always prefer homemade cakes which look a bit messy over the perfect ones from the counters. People put a lot of love and a tiny part of their soul in each recipe they cook at home for their dear ones. And always the homemade desserts taste better. Always!

What is Cream Cheese Danish pastry?
It is a type of pastry made from flour, milk, eggs, yeast and a pretty large quantity of butter. It is quite similar to croissants but it uses eggs and tastes a bit sweeter. However, the technique is very much alike, you need to roll the dough into a thin sheet and then fold it more times with a butter square. This rolling and folding process helps the dough turn into buttery and flaky layers.
This pastry is also known under the name of crescent roll Danish or simply put, Danish.
Our Cream Cheese Danish recipe - How do you make it?
This crescent roll Danish recipe uses a bit of a shortcut to the classic technique so it would be easier and less time consuming to prepare at home. We will only be rolling and folding three times instead of five or even six some other recipes require.
Another difference is that our cream cheese danish recipe will incorporate the butter into the dough instead of coating the dough with butter. We will still get the flaky layers but this will reduce the amount of work and time.
To get a nice and tasty homemade cheese Danish, please read carefully through the following tips before you begin. It is better to read the entire recipe so that you will know what to expect.
Once you make cream cheese, try our other easy cream chese recipes such as cream cheese cookies, or cream cheese lemonade pie.
Temperature
The temperature of the ingredients is very important. Make sure you keep that in mind.
Milk and egg need to be at room temperature. If you don’t have time to allow them to sit, slightly warm the milk. You may place the egg in warm water for 15 minutes. This could be a solution but it would be better to allow them to reach the room temperature.
Water has to be warm, meaning somewhere between 105F-115F. You need to feel it just a bit warm when it touches your skin. If you use cold water, the yeast won’t be able to develop and make the dough rise. In case you use hot water it will scald the yeast and the dough won’t rise either.
Because we want to make flaky cream cheese Danish recipe from scratch, we will use the butter cold, directly from the fridge. When you cut it, try not to touch it too much because it tends to melt very quickly. Take a sharp ceramic knife (that's sharpened) for cutting.
Making the dough

Be very gentle when you combine the wet and dry ingredients used in the recipe. We need to keep the butter pieces almost intact, this will ensure the flaky pastry.
A note about the working surface
You will have to flour the working surface anytime you roll the dough. It is pretty sticky and you won’t be able to work with it if you don’t have a generous amount of flour to use at hand.
Chilling The Dough
There are two stages of chilling:
Since these chilling stages are so important for the cheese Danish recipe from scratch, it is better to start the dough in the evening and serve it the next morning. Another good idea would be to prepare the dough in advance so you will have it at hand when you want to serve it.
The quantities in this recipe make two braids of homemade cheese Danish. Also the cream cheese filling recipe makes enough quantity for both braids. One braid can be cut in four or six slices, depending on how appetizing it looks to you.
The cream cheese filling for Danish is easy to make and will give it a cheesecake hint. You can play a bit with the cream cheese filling for Danish. There is the option of replacing cream cheese with ricotta if you want something lighter. Also you can add various berries (raspberries, blueberries, strawberries) to the filling. If you want some glaze for your cream cheese Danish, just prepare a simple one out of milk, confectioners’ sugar and lemon juice.
Of course, there is also the option to use puff pastry instead of making the cheese Danish recipe from scratch. This alternative is awesome whenever you are in a hurry and don’t have time to work that much for the dough. You will only need to prepare the cream cheese filling recipe and add it to the puff pastry. It might be a good idea to start like that in case all this information seems overwhelming.
The moment you will see that homemade cheese Danish is better than the store-bought one you will be willing to give this recipe a try. Once you master this recipe, try making a cinnamon roll apple pie as an alternative. It's delicious!
Equipment
- rolling pin
Ingredients
For the pastry
- 1 package dry yeast
- ¼ cup warm water (105F-115F)
- 2 ½ cups all-purpose flour
- 14 tbsp cold butter
- 1 large egg, at room temperature
- ½ cup milk, at room temperature
- ¼ cup sugar
- 1 tsp salt
Egg wash
- 1 egg, beaten
Cream cheese filling recipe
- 8 oz. full fat cream cheese
- 1/3 cup granulated sugar
- 1 egg yolk
- 1 tsp vanilla extract
- 1 tsp lemon juice
Instructions
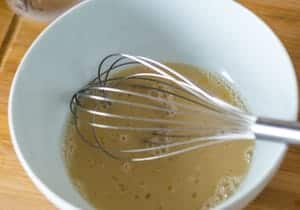
- Mix together the yeast and warm water in a large bowl. Whisk well until all the yeast dissolves. Set aside for 3 minutes until it becomes foamy. Bring in milk, salt and sugar. Mix again until all the wet ingredients are well combined. Set aside so you can make the butter-flour mixture.
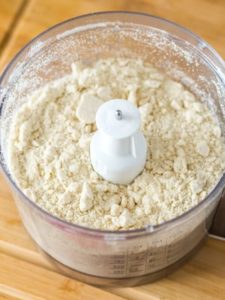
- Cut the cold butter into small cubes, about ¼ inch thick. Transfer them to a food processor. Add all the flour. Pulse ten or twelve times so the butter will get crumbled.
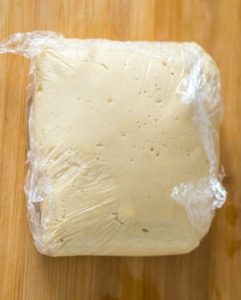
- Transfer the flour-butter mixture to the wet ingredients. Be very gentle when starting to fold them together. You will only need to moisten the dry ingredients. It is extremely important that the butter remains in pieces. This is how you make sure you’ll get a flaky dough. Therefore, be very considerate and compassionate when you combine the wet and dry ingredients to get the dough. Transfer it to a large piece of plastic wrap and hold it tightly. Take the dough to the fridge and chill it for at least four hours or overnight.
- After that, we will proceed with the rolling and folding operation. So take the dough out of the refrigerator to begin.
- Flour well your work surface. Keep the flour nearby as the dough will be very sticky.
- Flour your hands and gently flatten the dough with your palms to create a small square. Also flour the rolling pin and roll out into a rectangle of about 15-inch long. You might want to have a ruler at hand. Whenever you see that the dough sticks to the working surface or the rolling pin spread some flour in those areas. Fold the dough as you would do with a business letter: fold one third and then place the remaining third on top. Turn the dough once counterclockwise. Roll out again into a 15-inch rectangle, and then fold again. Repeat these steps once again so you will have a total of three times “rolling and folding”.
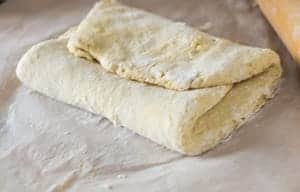
- Fold the dough again tight in plastic wrap and take it to the refrigerator for minimum 30 minutes and up to 24 hours.
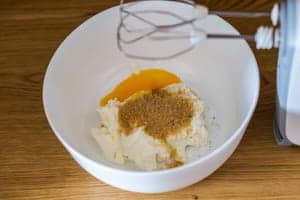
- Right before you start preparing the dough braids, you need to make the cream cheese filling. Place the cream cheese and egg yolk in a medium bowl. Beat together until smooth. Add in the lemon juice, vanilla and sugar. Mix again until everything is well combined.
- Take it out of the fridge, cut into two equal pieces, wrap one of them again and put it back to the fridge as you work with the first half.
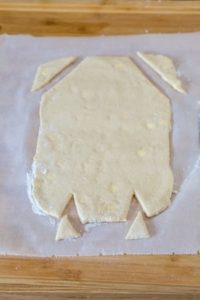
- Line your work surface with a piece of parchment paper. Flour it very well. Roll out the dough. You will need to create a 12’’x6’’ rectangle. Keep your ruler close to you. It is best to make the dough braid on a piece of parchment paper or silicone mat so you can transfer it directly to the baking tray. Otherwise it would be very hard to handle and need a lot of care to do that.
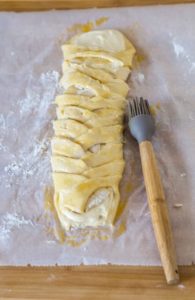
- Cut two corners of the rolled sheet on one small side and then two small triangles at the other end. Each triangle needs to be about 1 ½ inches apart from the edge of the sheet. Spread half of the cream cheese filling on the length of the center of the rolled dough.
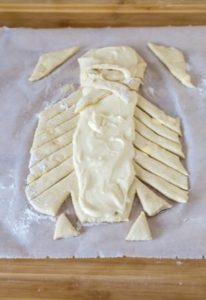
- Use a very sharp knife to cut oblique strips along both sides. If your strips remain stuck on the parchment paper, it means you haven’t floured the surface enough. Don’t panic, there is a solution. Flour the knife well and gently begin to insert underneath each strip so you will be able to separate it from the paper. Weave the strips on top of the cream cheese filling. Seal the filling by folding the bottom end up and transfer the braid along with the parchment paper to the tray. Set it aside to rest until you repeat the same process with the second piece of dough.
- Preheat the oven to 400F.
- Beat the egg for the egg wash. Brush the braids with the beaten egg to give them that beautiful glaze.
- Bake the braids separately, don’t try to squeeze both trays into the oven because it is possible that the top braid will not bake the same as the bottom braid. Bake for about 15-20 minutes, depending on your oven. My advice is to rotate the tray several times to ensure the braids bake evenly.
- I know it is hard, but let them cool for at least 10 minutes before sprinkling confectioners’ sugar and digging in.
Notes
- Use skim milk or whole milk. Try to avoid non-dairy milk for this recipe.
- Since the cream cheese Danish is not very sweet, you may serve it with your morning coffee, for a brunch or as a dessert.
- Don’t hesitate to add berries or other fruits to the cream cheese filling for Danish. It will look prettier with some extra color. You may also top it with almond flakes right before taking it to the oven.
- In case you feel there is too much dough and you don’t need many temptations near you, freeze half of the dough and use it later.
- And whatever you do, enjoy your homemade cream cheese Danish!
